| Performance
Suspension Components Polyurethane Front End Rebuild Kit - Page 3 of 12 |
| To remove and install the bushings, we
elected to build our own tool. We used a length of 5/8" ACME threaded
rod, two ACME nuts, different size washers, and pieces of different
diameter
pipe.
The idea here is to use the large diameter pipe to secure the tool on the control arm and allow a space for the bushing to be pushed into. The washers provide the different diameters necessary. One must fit inside the bushing sleeve to push the bushing out, and a stack of washers is used to span the end of the pipe. Nuts are placed at each end of the threaded rod. As they are tightened the bushing is pressed out. |
|
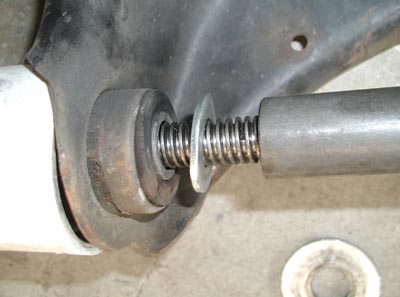 |
This first photo shows the pushing part of the tool, it uses a length of pipe and washer that just fits inside the bushing sleeve in the control arm. |
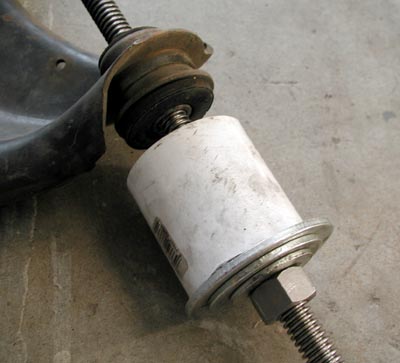 |
On the other side, a section of pipe is used that fits onto the control arm. This pipe needs to be just the right size to sit flat on the arm. |
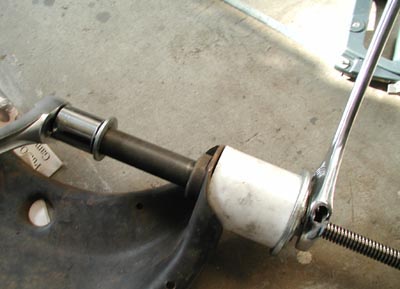 |
Here is the device in action. Two wrenches are used on the special ACME threaded nuts. The ACME thread is the type you see on industrial machines and C-clamps, it provides a much greater thread surface area so that it will not strip under extreme force. |
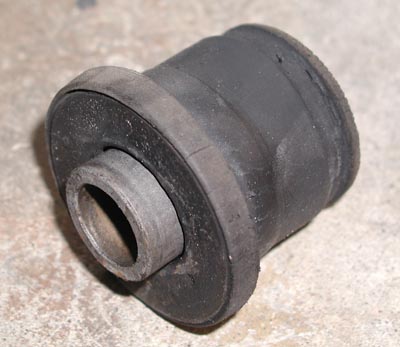 |
Here is the stock upper control arm bushing. Note how the rubber has changed shape. This is its natural position once it is out of containment of the stock bushing sleeve. It still has a good grip on the bushing shaft. It would be difficult to push the shaft from the bushing in this form. |
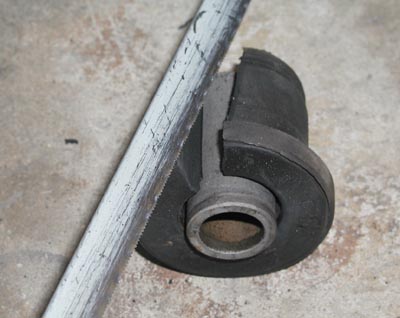 |
We cut rubber bushing apart using hacksaw. Be careful not to scratch the shaft, it will be reused later. |